Print using your Custom Profile using Adobe Photoshop
Printing through Adobe Photoshop

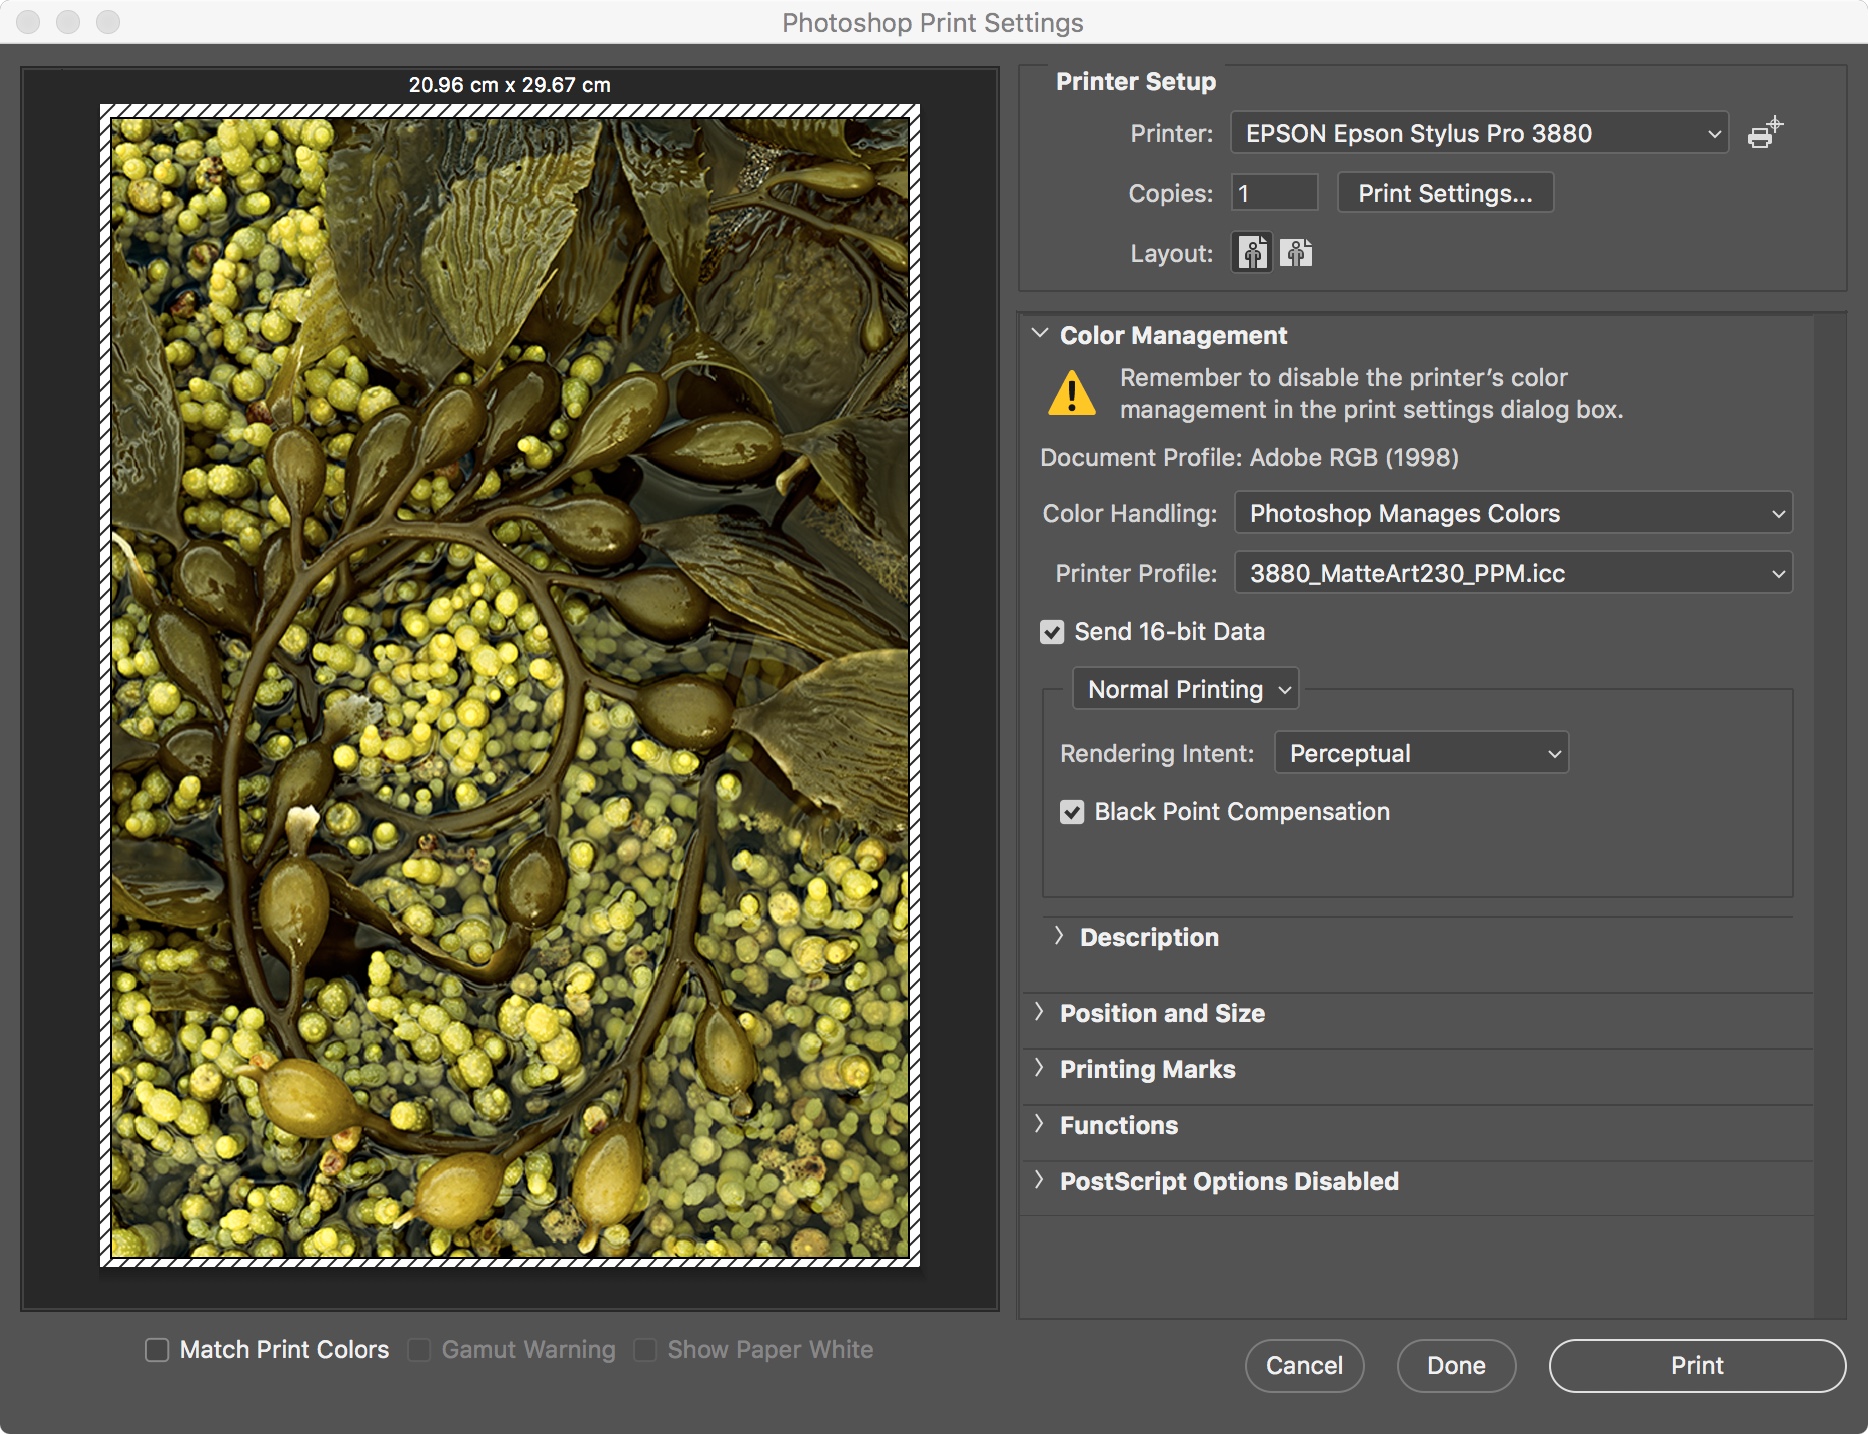
When you custom print profile in installed in your system, Adobe Photoshop will be able to see it and use it for printing and soft proofing. To use your print profile:
- Your image should contain a Document colour profile. This is likely to be sRGB, Adobe RGB(1998) or ProPhoto RGB. Photoshop will convert from this document colour to the print profile for your paper.
- Set Color Handling to 'Photoshop Manages Colors'
- Choose the Send 16-bit Data check box if your image is a 16bit rgb image
- Rendering Intent can be set to either Relative Colorimetric or Perceptual. These are different methods of transforming out of gamut colours in your image to the print colour space in your new paper profile. Perceptual is often referred to as the 'Photographic' intent which may produce a pleasing tonal rendering of landscape and portriat images. Relative Colorimetric is likely to produce a more accurate tonal and colour rendering of an image at the expense of saturated colours. There is not hard and fast rule as to which intent is best and can change with each image.
- Choose the 'Black Point Compensation' check box. This scales the black point in the image to the maximum black point of the print profile.
- Click on 'Print Settings...' Make sure you use the same print settings to print your images as you used to print the test charts you submitted to have you profile made.
