Eizo Color Navigator
Calibrating your Eizo CG series monitor using ColorNavigator
ColorNavigator is Eizo's own software for optimising usage of the ColorEdge range of graphics monitors. It uses bulit in hardware calibration, bypassing coreections in your computer's video card, to provide the smoothest tonal gradation possible.
Begin by installing the current version of ColorNavigator that is compatible with your operating system. Software downloads are avaiable at the Eizo Global site in their support section.
Video and USB cable connection
It is important that you connect your ColorEdge series monitor with both a USB and video cable. The video connection should be digital such as HDMI, Display Port or DVI. This provides the cleanest signal.
The USB conevtion is required as it comunicates the calibration data bewteen computer and monitor. The calibratin software will not run without the USB connection in place.
Start ColorNavigator
On a Mac
Double-click the “ColorNavigator 6” icon in the “Application” folder
The “ColorNavigator” icon appears in the Dock and then the main window appears.
On a PC
Click “Start” - “All Apps” - “EIZO” - “ColorNavigator 6”
The “ColorNavigator” icon appears in the notification area and then the main window appears.
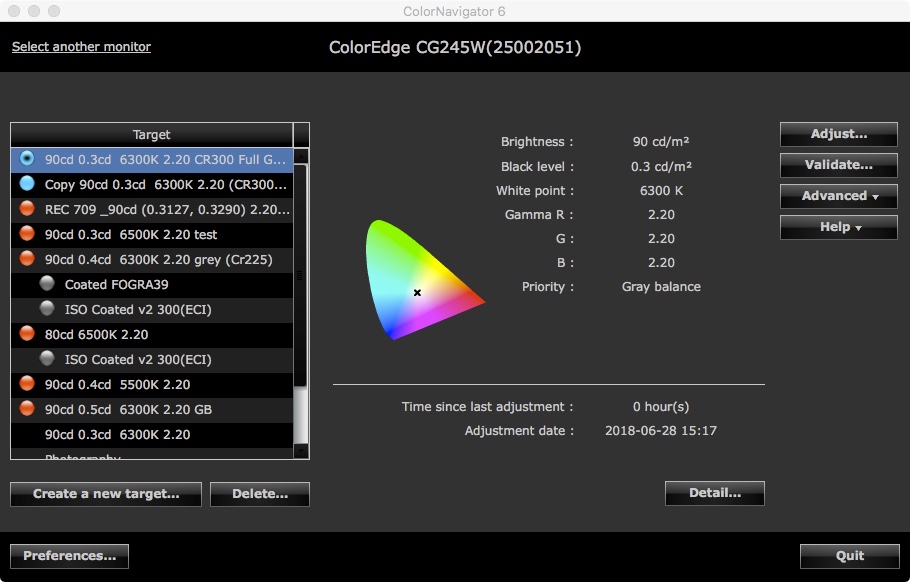
Main Program Window
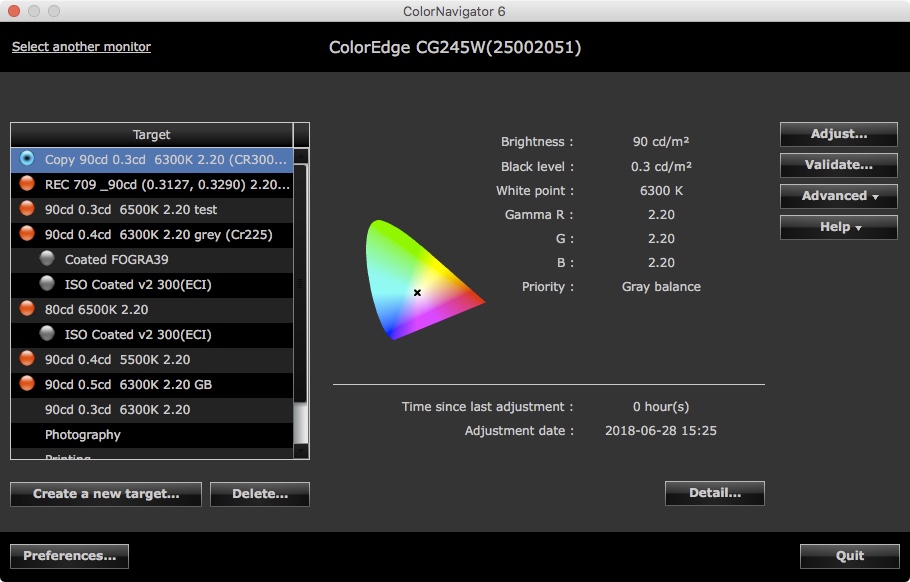 When you launch ColorNavigator this is the first window you will see. It is where we can see the status of our calibrations, what the current calibration parameters are, when the last adjustment date was and access to a number of tools.
The pane on the left shows the list of available targets. A target is a set of calibration parameters that we are aiming for which include brightness, white point, gamma and black level. When you first install the monitor there will only be three preset targets – Photography, Printing,
Creating your own target values
We are going to create our own target by clicking the Create a new target... button at the bottom left of the window.
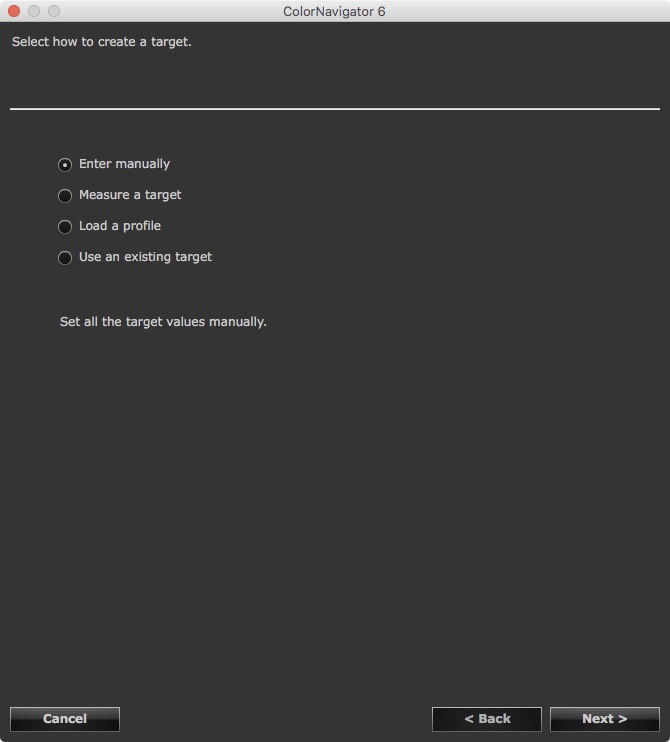
Chek the button that says Enter manually and click Next>
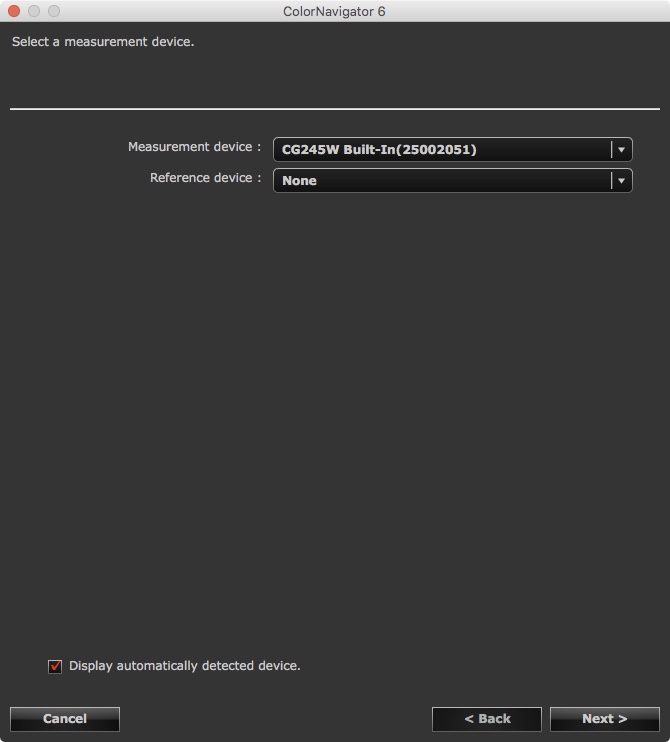
Here we can select a measuring device. If you monitor is a self calibrating model select Built-In. If you monitor requires an external device such as an i1 Display Pro or a DataColor Sypder, make sure it is pluged in to an available USB port and select it in the drop down menu.
Click Next>
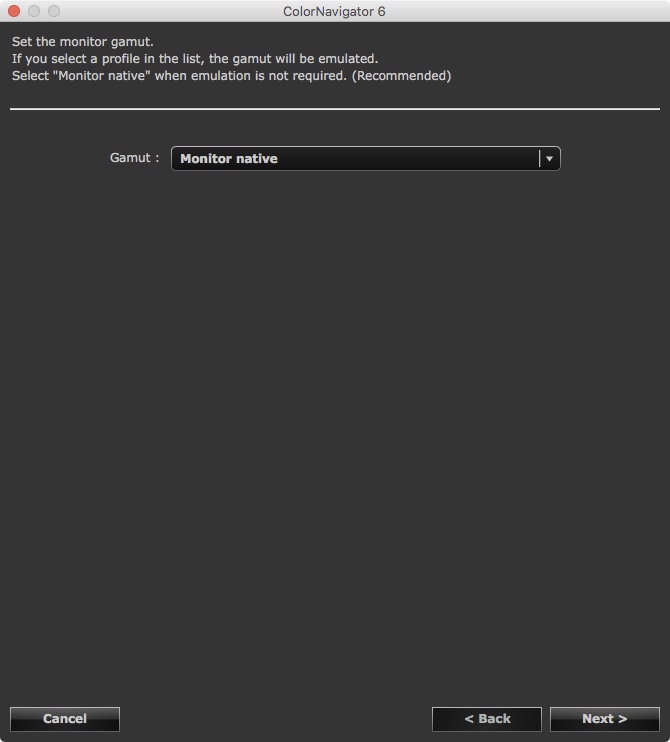
The monitor gamut is the range of colours that the monitor can display. These monitors can emulate other colour spaces but in this case we want to use the full range that the monitor can produce. Choose Monitor native
Click Next>
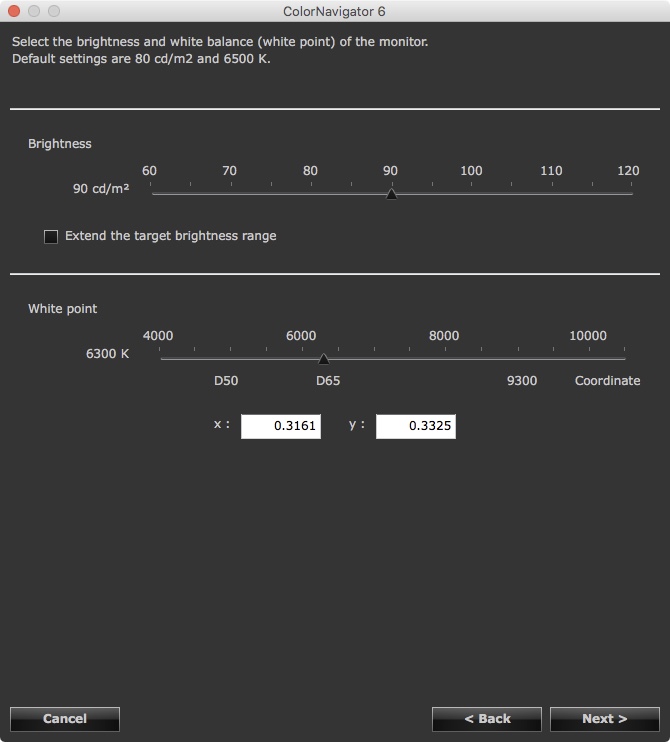
On this screen we set the brightness and colour of the white of the screen. Defaut settings meeting ISO 3664-2009 Graphic technology and photography - Viewing conditions standards are
- Brightness 80cd/m2 (candles per meter squared)
- White point D65 (6500K)
- Black level of 0.4 giving a Contrast Ratio 200:1
- Gamma 2.2
We use a slightly modified version of these values as our working environment is brighter than ISO and we use some warmer paper white papers. If you wish to emulate our settings enter the values shown in the screen shot above.
Click Next>
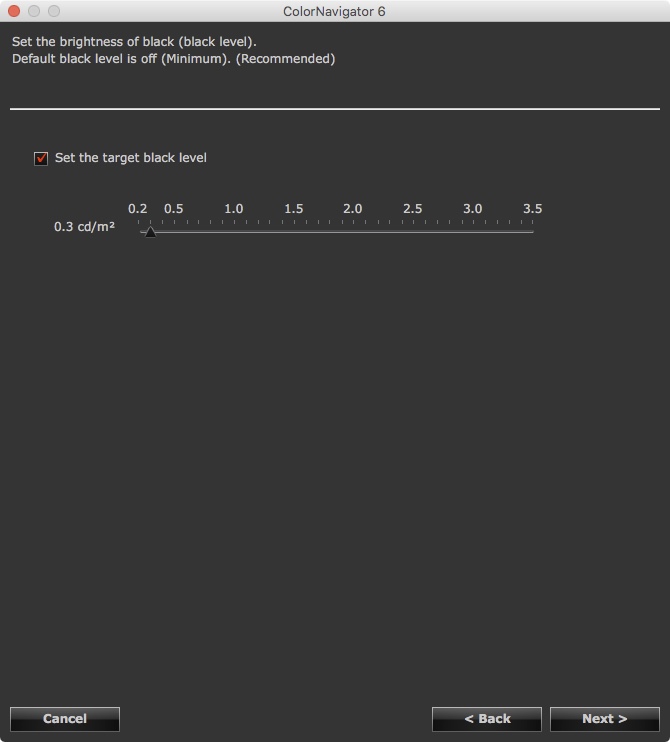
Click on the check box that says Set the target black level. Choose a value of 0.4 for ISO. We use a value of 0.3. as we find the inks in the newer series of printers provide a deeper black that previously attainable.
Click Next>
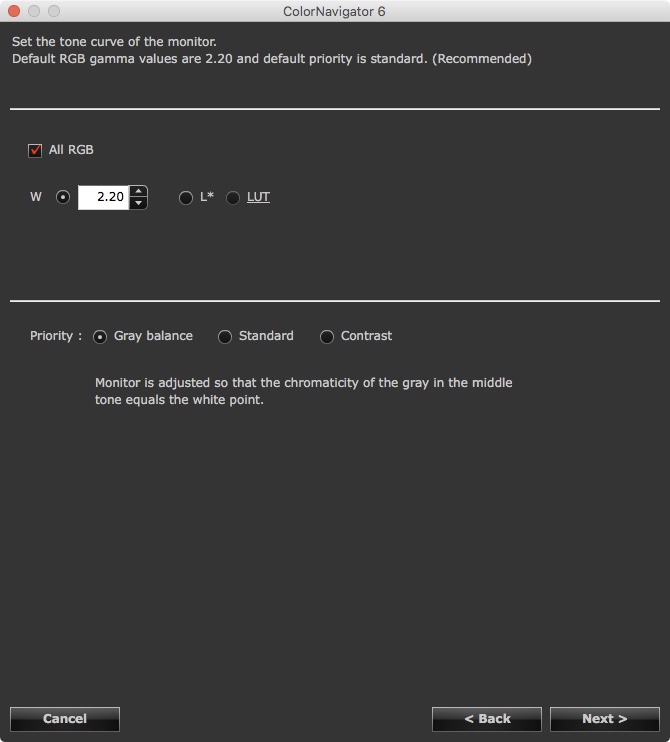
Leave the Gamma on the default of 2.2. We set our Priority on Grey Balance, though depending on the monitor model and calibration sensor, this may be overridden to Contrast.
From the Color Navigator manual:
When “Priority” is set to “Gray balance”, all points on the grayscale are adjusted toward the target white point. Select this when correcting with priority on the whiteness in the middle tone area. However, the following limitations apply when “Gray balance” is selected.
- The contrast might decrease.
- The gamut is narrower compared to when “Contrast” is selected.
- When the “Priority” for gamma adjustment has been set to “Gray balance” or “Standard”, you cannot adjust the black level or gamma manually.
- “Gray balance” and “Standard” cannot be adjusted with Spyder3, Spyder4, Spyder5, EX1, EX2, EX3 and the built-in calibration sensor of CG2420 / CG2730. Even if “Gray balance” or “Standard” is selected, an adjustment is made with “Contrast”.
Click Next>
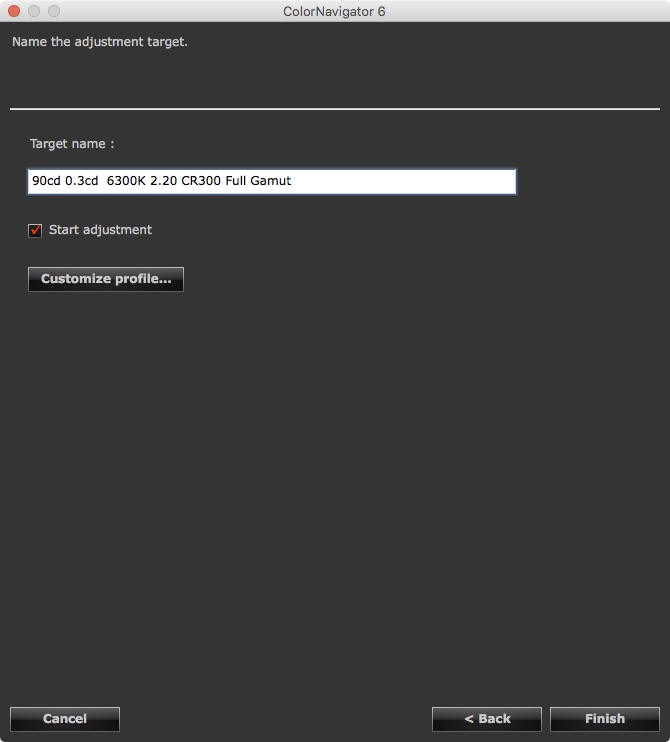
Name your Target something that will make sense to you when viewing it in the list of targets
Click Finish
You will be returned to the main screen.
Click on the Adjust... button
Choose your device.
Click Next>
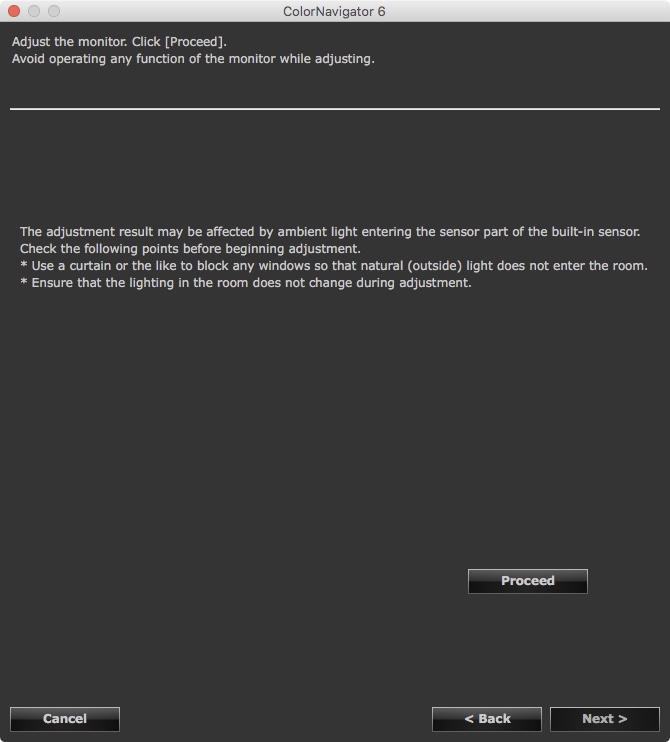
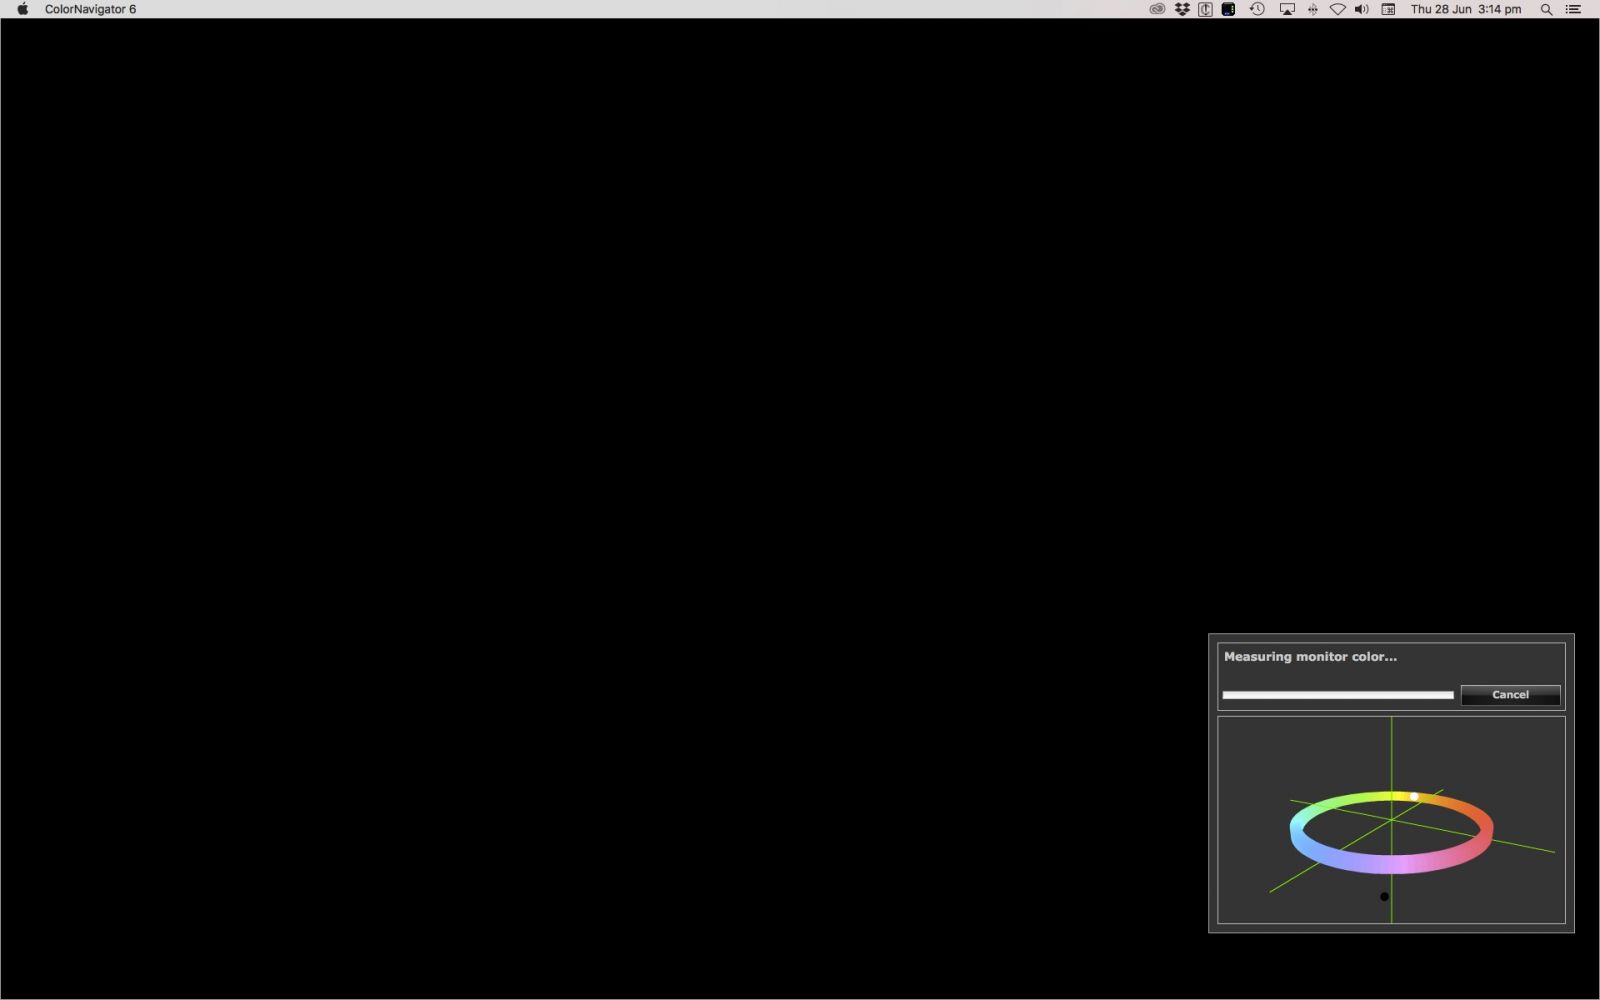
Click on Proceed. Your monitor will start it's calibration process. Make sure your room environment is dim or else put a dark cloth over the monitor while it is calibrating to prevent any stray ambient light affecting the sensor.
Resluts

When your calibration is complete you will see the result screen which shows the target values that you selected alongside the values that were measured. The reslut values will rarely be exactly the same as the target values but the screen above shows a satisfactory correlation.
Click Finish
You will be returned to the main screen where you will see the Time since last adjustment value has returned to zero and the dot next to your target in the target list will be blue with a black dot in the centre. This signifies that the calibration is current and active.