See what Mirage can do for you
1) Image Editing Directly in Mirage
Image editing in Mirage can be especially helpful if you open Mirage as a standalone program and therefore do not have access to the image editing functions in Photoshop or Lightroom, for example. All image edits you do in Mirage are non-destructive, i.e. they can be undone at any time and do not change the actual files. Another important advantage of editing images in Mirage is that the setting can be automated using droplets” or “stored settings.” More information on this can be found in the manual.
The following functions are just some of those available:
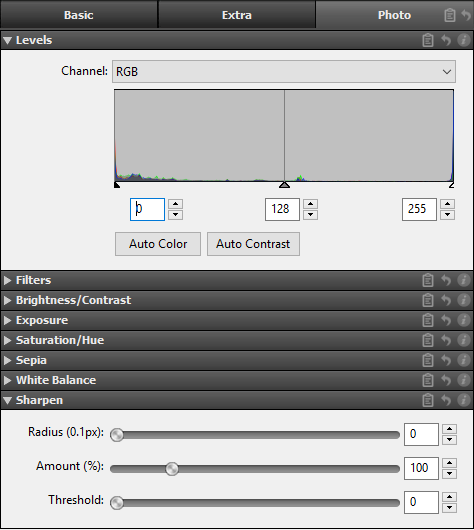
“Auto Color” adjusts the RGB values to a level that appears optimal for all images. This will not result in color shifts.
“Auto Contrast” adjusts the RGB values separately in order to produce an optimal value spread for each of the three channels. This may result in color shifts. There are also other configuration options for exposure, brightness/contrast, saturation/hue, sepia, and white balance.
You can find the new image editing options in the “Photo” menu of the print dialog.
2) User-Friendly Settings Dialog
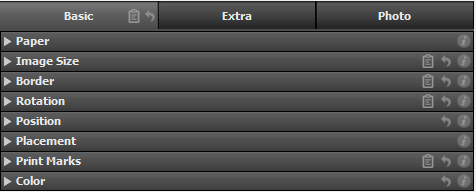
Mirage is now even more user-friendly! All of the settings in the print dialog have been divided into three logical configuration groups. The most common print settings, such as the paper source and image size, placement on the print medium, and print markings, can be found in the “Basic” tab. The “Extra” tab contains more specific, but more rarely used settings like “Crop,” “Logo Overlay,” and “Tiles” as well as print job management. The “Photo” menu provides all of the new image editing settings.
3) Adjustment of Image Sharpness
Mirage now provides the option of adjusting image sharpness immediately before printing. This filter works like the “Unsharp Mask” filter in Photoshop and is a powerful tool. You can find the option for adjusting sharpness in the “Photo” menu of the print dialog. What do the individual settings mean? The “Radius” controller determines how many pixels around a particular pixel are analyzed. The “Threshold” controller defines a percentage from which differences to neighboring pixels are detected. The contrast is increased for all detected pixels. As a result, bright pixels become a little brighter, and dark pixels a little darker. The “Amount” controller determines how much contrast is added, based on the two previously defined values.

4) Full 16-Bit Support of Print Data
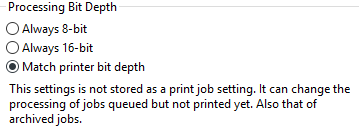
Mirage 4 internally uses a completely new image data calculation with full (end-to-end) 16-bit support. Even 8-bit image files can be processed at 16-bit precision. The printer receives the final print data at the maximum possible precision. The desired bit depth can be set in the “Settings…” menu under “Advanced.” This setting is not stored with the print job and can therefore be changed at a later point – in the Job Archive, for example – if a print job needs to be printed again. In the paper selection menu, “with” indicates which image data calculation your printer is using on the medium.
5) The "Loupe" Zoom Function
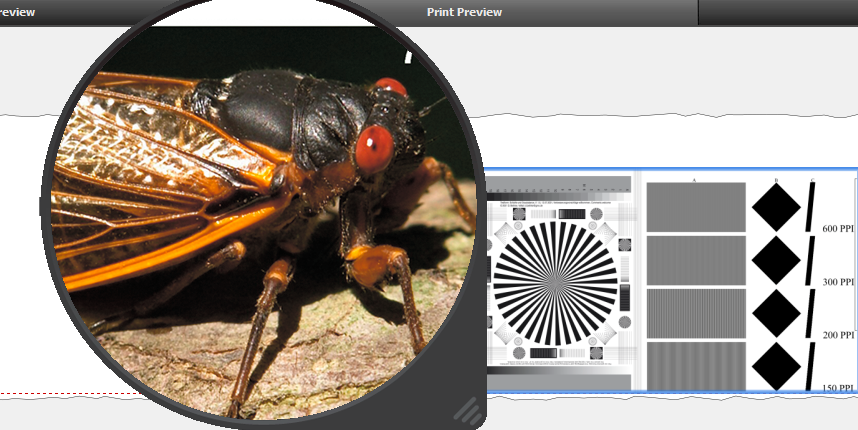
You can use the “Loupe” to view a pixel-accurate print preview at any time, even in the actual print preview, for example. The loupe zooms in to show the actual pixel-accurate print size, regardless of the display size in the Mirage window.
This zoom to 100% of the print data enables optimal control of the sharpness, resolution, and image depth of the actual print. The area shown in the loupe also contains the effects of any image editing done in Mirage. (See section 1, 3, and 7.)
6) Pixel-Accurate Print Preview
The new “Pixel-Accurate Preview” shows an actual print resolution, including all of the applied image and color management settings.

7) Support of Photoshop Filters
Mirage 4 allows for the use of Photoshop filters (tested with Google© Nik filters, for example). To apply the filters, go to the Mirage print dialog and select “Photo” and then “Filter.” Then simply choose the filter and click on “Apply Selected Filter” to activate it.
While filters in Photoshop can only ever be applied to one image, Mirage allows you to apply the filters to multiple images. The filters you select are always applied to the files loaded in Mirage which you selected.
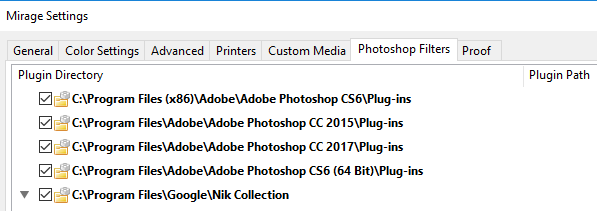
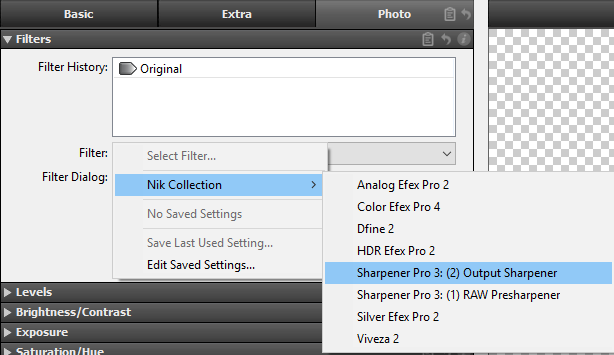
If you choose “Show for a selected document” the filter dialog is opened one time for one file and then applied to the previously selected files. Selecting “Show for each selected document” opens the filter dialog for every file but not for copies of the files. Selecting “Show for each selected copy” opens the filter dialog for all files, even copies.
Tip: Variations of the same image can be given different filter settings. “Don’t show”: If a stored filter setting is selected, filters are applied without the filter dialog being opened. Please note: In the case of filters that cannot be automated in Photoshop, Mirage will only display the option “Show for each selected document”, as these filter settings cannot be saved. As with all other functions, Photoshop filters can also be used as a “Stored Setting” for automatic processes. This allows several filters to be applied in sequence, for example, even during automatic processes.
8) Faster Print Preview
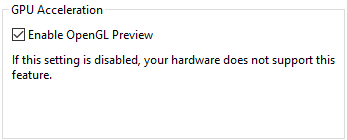
Thanks to OpenGL support, image editing functions are displayed more quickly. Naturally your computer must support OpenGL.
9) Real 64-Bit Structure Even on Mac
Both the “standalone” Mirage program and the Mirage plug-ins are native 64-bit applications. This significantly improves the simultaneous opening of many files or exceptionally large files.
10) Improved Workflow for Droplets
Droplets enable automated workflows. If you have generated a droplet and then drag files to a droplet while the print dialog is already open, the droplet settings are then automatically applied to the new files. If the printer and paper, for example, are already stored in the droplet, these saved settings are applied and the previously selected settings are overwritten.
Our tip: Droplets created in Mirage 3 can also be used in Mirage 4 (by double-clicking). More information on droplets can be found in the manual.
11) Optimized Print Dialog
Printers or new media can now be added directly in the main window if desired. The “on” selection menu now shows a submenu containing the loaded medium. Since some paper types are unfortunately given the same media ID by the printer manufacturers in some cases, several media are sometimes displayed for selection at this point. Please choose which medium is loaded. If the medium selected in Mirage differs from the medium loaded in the printer, a yellow warning triangle is displayed. This helps prevent print errors.
We have also revised the printer wizard in Mirage 4. The new wizard now lists all printers that are detected and supported. You can still add printers in the printer wizard like before using the “Add manually” button. The “Standard Sizes” menu shows the roll width determined by the printer. A yellow warning triangle next to the paper display indicates that the width set manually in Mirage does not match the width determined
by the printer.

12) New PRO Add-On Measurement Modes
The new “M1” and “M0” standard modes are now available. These can be found in the “Settings…” dialog under “Advanced.” The new measurement methods are only supported by the Epson SpectroProofer ILS30EP.
Note: The Mirage PRO add-on is only available if you have a valid license for this add-on.


13) Chroma Optimizer Selection
When a Canon printer with Chroma Optimizer is used/selected, the “Mirage Print” main window contains an additional selection field, “Chroma Optimizer,” next to the “Finest Details” field.
The following settings are available:
CO Auto: Chroma Optimizer is applied wherever there is ink.
CO everywhere: Chroma Optimizer is applied to the entire printable area (not including print margins).
14) Loading of Custom Media
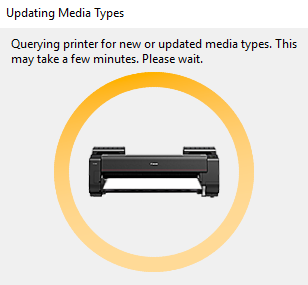
Some printers (especially the Epson SureColor SC-S and the Canon PRO series) provide the option of storing settings for (custom) media directly in the printer. When Mirage is launched or if you switch to one of these printers within Mirage, Mirage attempts to query the information on media stored there or update changes.
Communication between Mirage and the printer is indicated by the spinning orange circle, which turns green when successful and red when something goes wrong with the query. This process may take some time depending on the number of loaded media. Media which were loaded from a printer in this way are shown in the “Settings…” menu under “Custom Media” with “@Your Printer” as a suffix.
15) Full Support of LAB Color Space
In addition to RGB and CMYK data, Mirage now supports files that were created in the LAB color space.

